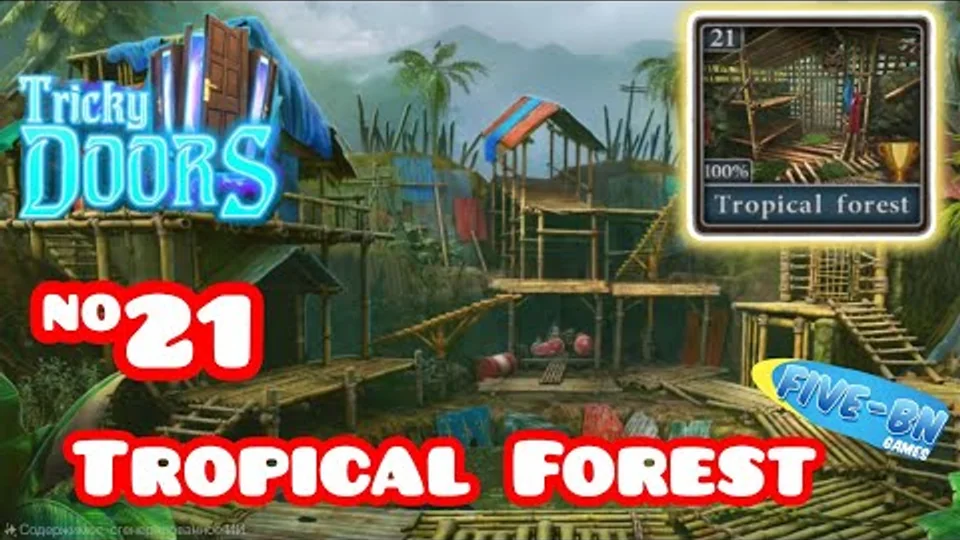
Escape from the tropical forest by first escaping from a prison cell, then exploring the compound and jungle areas, collecting items, solving various puzzles including star door lock puzzles, wires puzzles, painted faces puzzles, oil pump door puzzles, river maze puzzles, elephant cabinet math puzzles, lock pick puzzles, plane wreck eagle puzzles, and stone flower puzzles, helping another prisoner, navigating a river maze, repairing a sea plane, and finally taking off to escape the forest.
Escape from the tropical forest by first escaping from a prison cell, then exploring the compound and jungle areas, collecting items, solving various puzzles including star door lock puzzles, wires puzzles, painted faces puzzles, oil pump door puzzles, river maze puzzles, elephant cabinet math puzzles, lock pick puzzles, plane wreck eagle puzzles, and stone flower puzzles, helping another prisoner, navigating a river maze, repairing a sea plane, and finally taking off to escape the forest.
Tricky Doors Level 21 objective: Escape from the tropical forest by first escaping from a prison cell, then exploring the compound and jungle areas, collecting items, solving various puzzles including star door lock puzzles, wires puzzles, painted faces puzzles, oil pump door puzzles, river maze puzzles, elephant cabinet math puzzles, lock pick puzzles, plane wreck eagle puzzles, and stone flower puzzles, helping another prisoner, navigating a river maze, repairing a sea plane, and finally taking off to escape the forest.
Step-by-step walkthrough
01
Start the episode
Start in the prison cell in the tropical location. Notice the face design on a round board above the cell door; this is a clue for later. Collect a Stone Flower (1 of 3) from the floor on the lower right. inspect a red cloth that is hanging on the right of the door. Collect the red Rag. Collect the Bent Nail that the rag was hanging on. inspect the bamboo floor on the right below a pipe. Collect a Stone from the wall here. Place the bent nail on the rock floor on the right and use the stone on it to straighten it. Collect the Nail. inspect the pipe above this on the right; it is blocked. Use the nail to unclog it and water will flow out. Use the Rag on the flowing water to get the Wet Rag. inspect the upper bunk on the left side of the room, there is a stick attached at an angle. Use the stone on this to remove it and collect the Stick. inspect the cell door and use the wet rag on it. Add the stick and the bars will be bent. Exit the cell to the compound. Notice another face on a round board on the right side under a tree; another clue. On the right side is another locked cell, inspect this and talk to the prisoner. He needs your help to escape and to recover from an illness. Collect some Matches from the seat to the left of the prisoner. select a dark path below the building on the left to look inside.
02
Continue the item chain — phase 2
There is a lamp on the floor. Use the matches to light the lamp and then select it to place it on a hook and illuminate the passage. Move forward to a jungle clearing with a plane wreck. Collect a Lever from the ground on the lower right. inspect the cockpit of the plane wreck. Use the Stone to break the glass. Collect a Star from the legs of the pilot and also a Knife. inspect a set of fuses at the back of the cockpit and collect the one unbroken Fuse. Back up to the compound and inspect a generator below the stairs in the center. It is not working; collect a Magnet. Go back into the cell and inspect the upper bunk on the left again. Use the knife to cut and collect the Rope. inspect the magnet in your inventory and add the rope to it to get the Magnet on a Rope. Exit the cell again and look at a round tire on the left of the central pond, this is a well. Use the Magnet on a rope here to collect a Wrench. Go through the passage again to the Plane wreck. inspect a blue box on the left side of the scene. Use the knife on the red tubing to collect the Hose. Open the blue box and use the Wrench here to remove and collect the Spark Plug. Go back to the generator in the compound. Use the wrench to remove a broken spark plug from the top. Place the new spark plug and use the wrench again to insert it. select the spark plug cap with the wire to attach it.
03
Continue the item chain — phase 3
Press the red button to start the generator. inspect the pond in the center of the compound. Notice a blue board on the left with yellow lines and dots; this is a clue. inspect the door to the building on the upper left. Add the star to the lock and you will discover a star door lock puzzle. Solve the star door lock puzzle; move the large block with the arrow from the right side to the left side. Slide the small pieces around the grid to make way. Move small pieces to the left initially to make room to move the large block forward and up or down. Move the small pieces around it and continue the progress. Once done the door is open and you can look inside at a control panel. Add the Lever to the center. Set the three levers to the correct positions according to the clue from the pond. Once done this will turn some ladders in the compound and allow you to pass through the path at the top center to the next area. This is an Oil pumping station. Notice another face on the board on the building. Collect a Brush from the top of the red barrel on the bottom right. Back up to the cell that you started in. Look on the wall on the far right to find some green moss. Use the brush here to clean away the moss and then you will see a clue with three shapes. Go back to the oil pump station and inspect the door to the building. On the right is a red box, inspect this next. You need a three digit code, use the shapes clue from the cell wall. Collect the Pliers and the Stapler.
04
Continue the item chain — phase 4
inspect a metal ladder on the right of the pump structure. This is held on with wire. Use the pliers to cut the wire and then you can collect the Ladder. Go to the plane wreckage and use the ladder on the large box on the right side to make a bridge. inspect the box and then use the knife to cut the straps. Collect the Belt. With the box open, collect the Insect Spray and a Harpoon. Use the Knife on the tree on the right to collect some Resin. Go to the oil pump and select the path on the right side to inspect it. There are insects; use the insect spray to get rid of them. Move forward to a river. Collect another Stone Flower (2 of 3) from the ground in the center. Look in the small boat on the right and collect a Pulley and a Fishing Rod. Back up to the compound and inspect the pond in the center. Use the Fishing rod here to collect a bottle of Machine Oil. Go to the Oil pump and inspect the machinery on the right. Add the Pulley and then add the Belt (you need to remove the old broken belt first). Use the Stapler on the belt to secure it. Press the red button; the pump will start but then stop again. inspect the pump arm on the top right to see the pivot point. Use the Machine oil on this to lubricate it. Press the button again and the pump will start. Oil will fill the large container on the lower left. Look inside and you can now collect a Speargun.
05
Continue the item chain — phase 5
inspect the Fishing rod in your inventory and use the knife on it to cut and then collect the Fishing line. inspect the Speargun in your inventory, add the fishing line to it and then the harpoon. You now have the loaded Speargun. Go through to the river and use the speargun on the raised bamboo bridge on the far side to shoot it and then lower it. Look inside the blue tarpaulin covered tent on the far side. Collect the Oar (1 of 2) and some Lock picks from the table. Collect a Blade (1 of 3) and a Bucket from the boxes and barrels on the left. inspect the door to the building on the right; there is a panel on the side. Add the Fuse to it to start a wires puzzle. Solve the wires puzzle; there are eight colored wires at the top. Drag and place these into the four rows of holes below. Placing them will activate or deactivate the lights at the bottom. Find the correct placements to fit in all eight wires and turn all of the lights on. You can now enter the building, it is a bar. You need to lift the large blue crate, to do this you need to find 10 sacks. Collect Sacks from a bar stool on the left. Collect a Sack hanging from a bamboo on the left. Collect another Sack on a bamboo rail on the far right (3 of 10). Look in the Mezzanine above the bar. Collect Sacks from a box behind the green curtain. Open the large basket for another one. Collect one more from the top shelf on the right. Collect two more from two boxes on the lower shelf, one has a large leaf over it and one is in the shelf (8 of 10).
06
Continue the item chain — phase 6
inspect a table at the back of the room behind the blue crate. Collect an Oar (2 of 2), then move the chair to find another Sack (9 of 10). inspect the counter behind the bar and find another Sack on the floor (10 of 10). Add the sacks to the hook above the blue crate and it will be lifted. Collect a Saw from the floor underneath. inspect a collection of eight painted faces on the back wall on the left. This is a painted faces puzzle. Solve the painted faces puzzle; there are eight different faces. You have seen some of these already in the locations. select the three faces that match the ones that you have seen. A panel opens and you can collect the Medicine Remedy. inspect this and you will see a list of items that you need to collect. Use a knife on the green rosemary hanging from the ceiling by the green light shade on the top right. Collect the Rosemary. Look again on the Mezzanine and collect a Mango from the left. Back up to the Oil Pump and look in the Oil container. Use the Bucket here to collect a Bucket of Oil. Back up to the starting cell and look on the floor on the right again. Use the saw here to cut a hole. Collect a Drop and also an Elephant Ear (1 of 2). Go to the Plane crash area and collect a Porcini Mushroom from next to the ferns on the far left. Look inside the opened crate on the right and collect a Rosehip. Go back to the Oil pump and inspect the door to the building.
07
Continue the item chain — phase 7
Place the Drop on to the door lock to start an oil pump door puzzle. Solve the oil pump door puzzle; this puzzle has a circle with eight pink rods. select a rod to slide it into the center or out onto the circle if there is space. With each move the inner circle with any rods on it will turn to the next position. Place all of the rods into the eight slots on the outer circle to complete the puzzle. Once the door is open enter the boiler room. Collect a Paintbrush from the bench and a Cylinder from the right side. Return to the bar and inspect the counter behind the bar again. Place the cylinder in the bracket on the right. Add the hose and connect it to the burner and the cylinder. select the sauce pan on the left to place it on the burner. select the green dial on the cylinder to turn on the gas. Use the matches to light the flame. Add the Resin to the pan to melt it. Collect the Hot Resin. Back up to the riverside and inspect the small boat. Add the Oars to it. Add the hot resin to the boat and use the paintbrush on it. This will fill the hole in the side of the boat and repair it. Use the boat to explore the river. Navigate the river maze puzzle; there are paths on the river to take. You will reach various locations. In each location there is the possibility of finding one or more Arrows. You need to collect ten arrows to be able to exit the maze.
08
Continue the item chain — phase 8
Arrows may be hidden behind or under objects, in trees etc. You may need to find objects such as a rope in a location to then let you collect an arrow. You will find a location with a large log hanging by ten ropes that blocks your path. On the right of this is a Bow. Once you have all ten arrows you can use these on the Bow and it will shoot the ropes and remove the log. This lets you move on to the next area. You arrive at the sea plane. Collect another Ear (2 of 2) from the pontoon on the right. Collect a red Jerrycan. inspect some flowers growing on the rocks on the left side of the river. Use the Knife here to collect the Blue Violet. Return to the Bar and inspect a green metal cabinet on the right. Add the Two ears to the lock to reveal an elephant cabinet math puzzle. Solve the elephant cabinet math puzzle; there is a 9 digit keypad, you can swap the numbers around. At the top and right side are total numbers. Arrange the numbers on the keypad so that the rows and columns add up to the totals shown at the top and side. Collect some Chicory Root and an Eagle. inspect the Medicine Ingredients list in your inventory and add to it the six items you have collected. You will receive the Medicine Ingredients. inspect the bench behind the bar again. Add the Ingredients to the bench. Use the knife on these to chop them. After this you will collect the Medicine.
09
Continue the item chain — phase 9
Return to the compound and talk to the other prisoner again. Use the Lock picks on the gate lock to start a lock pick puzzle. Solve the lock pick puzzle; use the lock picks on the left and right by sliding them into the notches and gaps on the three rings. You can then turn each ring to help you line them up. Line up all three rings so that the lock picks can slide into the center at the same time and press the small buttons. Give him the Medicine. He is ready and then you can collect a Handle. Go to the crashed plane in the jungle and look on the side of the wreckage. Add the Eagle here to open a panel, there is another puzzle. Solve the plane wreck eagle puzzle; select the tiles to rotate them and line up the paths. Use the Arrow buttons to move the red diamond shape along the lines. Move the Red diamond to the exit point on the right. Collect a Blade (2 of 3) and a Screwdriver. Look at the tail of the crashed plane; there is another blade here. inspect this and use the screwdriver to remove the bolts. Collect the Blade (3 of 3). Move through the river to the sea plane that you need to repair. Look on the pontoon to see a propeller assembly. Add the three Blades to it and collect the Propeller. inspect the front of the plane. Place the propeller here, then select the three nuts on the top of the plane to place them. Use the Wrench next to secure them. inspect the door to the plane and place the handle on it.
10
Complete the escape
Look inside the plane and collect another Stone Flower (3 of 3). Go back to the starting cell. select a poster on the wall on the left to remove it and you will see three slots. inspect these and place the stone flowers to start a stone flower puzzle. Solve the stone flower puzzle; there is a grid of patterns, you can rotate sets of four of them at a time to re-position them. There are two types of pattern, a Star and a Flower shape. On the right is a diagram showing how you need to arrange the patterns. Notice that the rows are marked in red as I, II and III. Collect a Funnel and a Lever Handle. Go to the Oil pump and enter the boiler room again. Add the Bucket of Oil to the green vat on the left. Add the lever handle to the pipe from the large tank on the right. Add the Jerrycan to the pipe on the right as well. Turn the lever handle. You will collect the Gasoline. Go back to the sea plane and inspect the fuel cap on the side of the plane on the right. Use the funnel here to open the cap. Use the gasoline to fill the plane. select the rubbish in the water blocking the planes path. Use the knife on it to cut the ropes and clear the way. select the plane to enter it and start the sea plane takeoff puzzle. Solve the sea plane takeoff puzzle; as the plane speeds up you need to select the left and right arrows to avoid rocks and debris in the water. Once you are clear of the debris and the speed reaches 100 you will take off. You have completed Level 21; Tropical Forest.
Before you leave this episode
The sequence includes every item required to finish the episode. Optional morphing objects and bonus collectibles are not needed for the exit. If the final transition does not start, reopen the most recent close-up and confirm that every required inventory item was used rather than merely collected.
Notes and precautions
This guide is mapped to Tricky Doors Level 21, “Tropical Forest.”
Complete inventory actions in order; later objects often remain inactive until an earlier mechanism is solved.
If an item will not combine, return to the scene where the game first introduced the matching clue.
The episode ends only after the final portal, vehicle, door, or story transition activates.
Useful solving habits
1Rotate your attention between the full scene and close-up panels; small tools are often hidden at the edge.
2Keep written recipes, symbol patterns, and color orders available until the related lock is complete.
3Inspect inventory objects directly because many tools must be assembled before they can be used.
4For randomized minigames, follow the stated rule instead of copying one fixed board layout.
Tropical Forest: Escape from the tropical forest by first escaping from a prison cell, then exploring the compound and jungle areas, collecting items, solving various puzzles including star door lock puzzles, wires puzzles, painted faces puzzles, oil pump door puzzles, river maze puzzles, elephant cabinet math puzzles, lock pick puzzles, plane wreck eagle puzzles, and stone flower puzzles, helping another prisoner, navigating a river maze, repairing a sea plane, and finally taking off to escape the forest.
What the video shows
This dedicated recording follows the same named world from its opening inventory search to the final escape. Use the written phases to find the relevant mechanism before loading the video.
Quick feedback
Did this clue help you?
Your anonymous Yes or No helps us find walkthroughs that need another check.