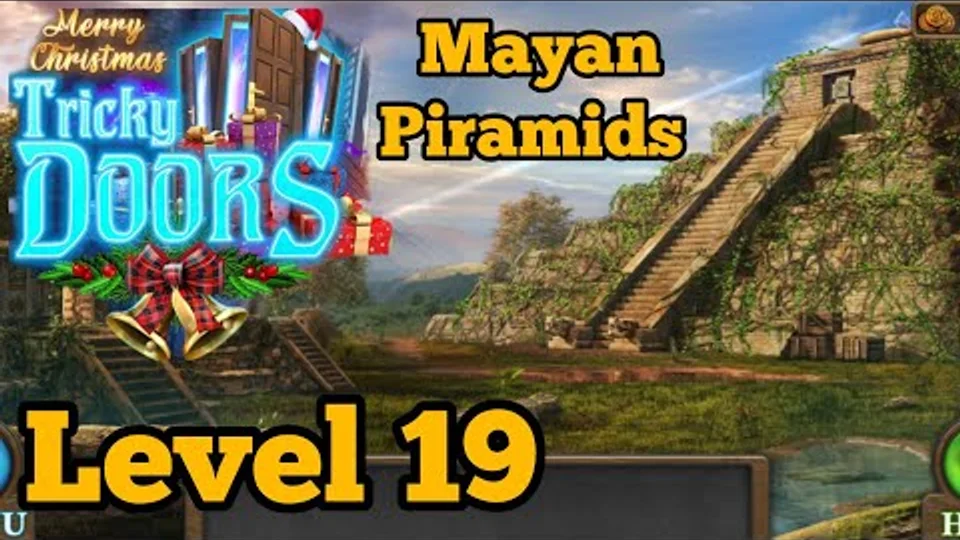
Escape from the Mayan pyramid ruins by collecting items throughout the jungle area, camp, and pyramid chambers, solving various puzzles including statue puzzles, zodiac puzzles, chest puzzles, stone chest puzzles, triangle puzzles, jade figure arrangement puzzles, snake head puzzles, and circle puzzles, crafting necessary tools like a hook on a rope and a shovel, and finally escaping from the Mayan ruins.
Escape from the Mayan pyramid ruins by collecting items throughout the jungle area, camp, and pyramid chambers, solving various puzzles including statue puzzles, zodiac puzzles, chest puzzles, stone chest puzzles, triangle puzzles, jade figure arrangement puzzles, snake head puzzles, and circle puzzles, crafting necessary tools like a hook on a rope and a shovel, and finally escaping from the Mayan ruins.
Tricky Doors Level 19 objective: Escape from the Mayan pyramid ruins by collecting items throughout the jungle area, camp, and pyramid chambers, solving various puzzles including statue puzzles, zodiac puzzles, chest puzzles, stone chest puzzles, triangle puzzles, jade figure arrangement puzzles, snake head puzzles, and circle puzzles, crafting necessary tools like a hook on a rope and a shovel, and finally escaping from the Mayan ruins.
Step-by-step walkthrough
01
Start the episode
Start in the first area in front of the Mayan pyramid. select the log in the center and collect a Knife and Stones (1 of 4). inspect the crates on the right in front of the pyramid. Use the knife to cut the ropes on the large crate. Collect the Rope from the crate. inspect the stone archway on the left side. Collect Stones (2 of 4) from the ground near the archway. select in the center in the distance to move through to a Camp area. In the camp area, collect the Jade Figurine (1 of 4) from the ground near the center. Collect the Stick on the ground just to the right of the jade figurine. Look inside the tent. Collect the Glove, the Water (pouch), and a Hook from the tent. Use the knife on the hanging cloth on the left to collect some Cloth. inspect the hook in your inventory and add the rope to it to create a Hook on a rope. Use the hook on a rope on the tree on the far right to reach a hole at the top.
02
Continue the item chain — phase 2
Use the Glove on the hole to collect a Piece of Wood. inspect the Statue on the left side of the camp. Collect Stones (3 of 4) from near the statue. Add the piece of wood to the left side of the statue. This will allow you to access a puzzle in the center of the statue. Solve the statue puzzle; there are 2 sections, a large section at the top with 2 rows of blocks and a smaller one at the bottom with 1 row. select pairs of blocks to swap them around. Arrange them to complete the carvings. Once solved, collect another Stones (4 of 4). inspect the tree stump to the left of the path. Use the knife here to cut away some of the bush. Collect a Detail (1 of 2) from the bush. Back up to the Pyramid and select the block at the top of the steps. Add the 4 stones to this to fill in the circles. This will start a zodiac puzzle. Solve the zodiac puzzle; there are 2 circle rings of symbols.
03
Continue the item chain — phase 3
The outer ring has images depicting the 12 zodiac signs and the inner ring has symbols of the same 12 signs. They are not lined up; arrange them so that they match each other. Spin the inner ring and use the gaps on the left and right of the outer ring to let you switch the inner ring pieces around. The inner ring pieces will light up when they are in the correct locations. Once solved, the door at the top of the pyramid opens; go inside. Inside the pyramid, collect another Jade Figurine (2 of 4) from the floor on the left. inspect the large stone chest on the lower left. Collect the Tongs from behind the chest. Back out and return to the camp area. inspect the basket on the rocks in the distance. Open the lid to find a snake. Use the Tongs to collect the Key from under the snake. Enter the Tent again and use the key to open the chest on the right. It will open a panel to reveal a chest puzzle. Solve the chest puzzle; there are 4 locks, which have 9 parts that are split apart.
04
Continue the item chain — phase 4
You can rotate the parts for each of the locks around the center and also rotate the pieces themselves. Tapping the blue button in the center will try to join the lock parts together. Arrange each lock parts so that they fit together and complete the symbol on it, then join them together. Hint: select the outer ring of each lock to move the pieces around until the 4 with the curved edges are next to the curve of the lock outline. select the center to rotate the pieces until the curves are pointing to the outside. You can then close the lock. Once all 4 locks are complete, the chest will open. Collect the Hammer, the Matches, and another Detail (2 of 2). You can also inspect a paper with some instructions. Back up to the first area and inspect the large stone chest on the left of the scene. Add the 2 'Details' to the top to start a stone chest puzzle. Solve the stone chest puzzle; the grid of diamond shapes on the right has some that are lit up and some that are not. When you select the button at the top left it will change the lights from light to dark and back again. Placing a detail on the grid will prevent the diamonds that the details covers from changing. Use the details to 'Hold' specific diamonds and keep changing the others until all of the lights on the grid are on. You can only place one detail at a time.
05
Continue the item chain — phase 5
Once solved, collect a Pry Bar and a Cast from the chest. inspect again the wooden crates to the right of the pyramid steps. Use the pry bar to open the closed crate. Collect the Plaster Figurine and the Shovel Blade from the crate. Also take the Brushwood (1 of 5) from the left open crate. inspect the shovel blade in your inventory and add the stick to it. You then need to also add the knife to cut the stick and make a complete Shovel. Return to the room at the top of the pyramid. Collect a Cauldron from the floor on the right. inspect the loose tile on the floor near the center. Use the pry bar to lift it and collect a Casket. inspect the low table in front of the central altar. Collect the Bowl. Collect another Brushwood (2 of 5) from the left side of the table. Back up and inspect the snake heads at the foot of the steps to the pyramid.
06
Continue the item chain — phase 6
Collect another Brushwood (3 of 5) from the snake mouth on the left. Return to the camp area. First inspect the tree stump on the left again and collect a second Brushwood (4 of 5). Use the Shovel to dig in the ground. Collect another Jade Figurine (3 of 4) and a Seal from the ground. inspect the basket with the snake again. Collect the Brushwood (5 of 5) from the ground. Use the Knife to collect the orange Resin from the log on the left. select the old fire pit on the right of the camp. Add the 5 brushwood and the Cauldron to the fire pit. Place the resin in the cauldron. Use the matches to light the fire. Once the resin melts, use the bowl to collect some melted resin. inspect the Cast in your inventory. Add to it the cloth, and then the Plaster figurine. select this to wrap the figure in the cloth.
07
Continue the item chain — phase 7
add the Hammer as well to smash the figure. You will have some plaster dust in the cast. add the water to the dust. You will be able to collect a Paw Print. Return to the room at the top of the pyramid. inspect the idol in the center of the altar. Add the Paw print to the slot on the right. The mouth will open and you can select inside to start a triangle puzzle. Solve the triangle puzzle; this puzzle has an image with 6 triangular pieces out of position. select a piece to make it and others slide around the lines on the puzzle. You need to get all 6 pieces to align in the correct locations to complete the image. Once complete, collect a Key and another Jade Figurine (4 of 4). inspect the casket in your inventory and use the key to open it. When the first lid opens, use the Seal to open the second lock. Collect the Emerald from the casket.
08
Continue the item chain — phase 8
inspect the Stone table in front of the altar again. Add the bowl of resin to it. Use the matches on the pool of resin to light it. This will reveal a clue showing the correct arrangement of jade figures. select the right wall to see 4 slots in the wall. Add the 4 jade figures to the slots. You now need to swap the figures around to get them in the correct positions. Use the clue in the resin to help you arrange them correctly. Once arranged correctly, collect the Crystal (1 of 2). Exit the room and inspect the Snake Heads at the foot of the steps again. Add the Emerald to the eye on the right. The mouth will open and reveal a snake head puzzle. Solve the snake head puzzle; there are 8 direction arrows around the circle. select these to move the green gems around the board. You need to arrange the 4 light green gems onto the 4 dark green spots in the center of the board. The green gems will not go outside the circle so you can use this to help you bring them together.
09
Complete the escape
Once solved, collect the Figured Detail. Return to the room in the pyramid and inspect the stone chest on the left. Add the figured detail to the lock and it will open to reveal another chest puzzle. Solve the chest puzzle; select the green arrows to move the crosses around the board. Moving one cross will also move the other one if there is room for it to move to. There are some walls in the board to block movement. Move both crosses to the finishing positions at the same time. Once solved, collect the second Crystal (2 of 2). Back out to the clearing again and inspect the Stone archway on the left. Place the 2 crystals on the pedestals. A final circle puzzle will appear in the ground. Solve the circle puzzle; there are 4 disks that you can turn, each one has a square block on it. Turning one circle will also affect the position of others. Align the square blocks on each circle with the 4 square holes. This will activate the portal in the Archway. Pass through the portal to escape the forest and complete Level 19; Mayan Pyramids.
Before you leave this episode
The sequence includes every item required to finish the episode. Optional morphing objects and bonus collectibles are not needed for the exit. If the final transition does not start, reopen the most recent close-up and confirm that every required inventory item was used rather than merely collected.
Notes and precautions
This guide is mapped to Tricky Doors Level 19, “Mayan Pyramids.”
Complete inventory actions in order; later objects often remain inactive until an earlier mechanism is solved.
If an item will not combine, return to the scene where the game first introduced the matching clue.
The episode ends only after the final portal, vehicle, door, or story transition activates.
Useful solving habits
1Rotate your attention between the full scene and close-up panels; small tools are often hidden at the edge.
2Keep written recipes, symbol patterns, and color orders available until the related lock is complete.
3Inspect inventory objects directly because many tools must be assembled before they can be used.
4For randomized minigames, follow the stated rule instead of copying one fixed board layout.
Mayan Pyramids: Escape from the Mayan pyramid ruins by collecting items throughout the jungle area, camp, and pyramid chambers, solving various puzzles including statue puzzles, zodiac puzzles, chest puzzles, stone chest puzzles, triangle puzzles, jade figure arrangement puzzles, snake head puzzles, and circle puzzles, crafting necessary tools like a hook on a rope and a shovel, and finally escaping from the Mayan ruins.
What the video shows
This dedicated recording follows the same named world from its opening inventory search to the final escape. Use the written phases to find the relevant mechanism before loading the video.
Quick feedback
Did this clue help you?
Your anonymous Yes or No helps us find walkthroughs that need another check.