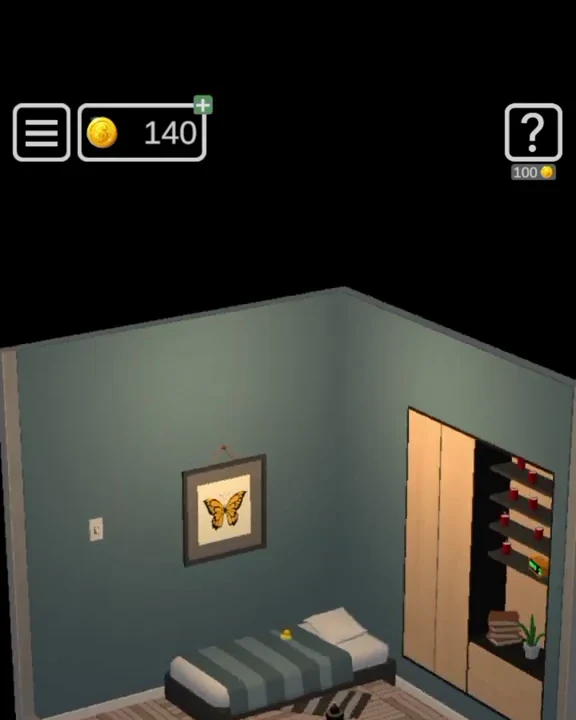
This guide is mapped to “Perception” in Act 1 · Peter. Compare the title, room colors, and main objects with the screenshot before following the sequence.
50 Tiny Room Escape Level 1 walkthrough & guide
50 Tiny Room Escape Level 1, titled “Perception,” is a layered escape-room puzzle rather than a single lock. The room can be rotated, and several close-up views hide objects or clue fragments that make sense only when combined. The decisive objective is to combine the book's 19 with the bottle's 78 and enter 1978. The game records completion through the four correct keypad digits being accepted.
The screenshot above comes from the matching 50 Tiny Room Escape Level 1 segment of the credited full walkthrough. Use it to confirm the room identity, then work through the chain in order. Collecting a later object early is harmless, but skipping a mechanism can leave the next interaction unavailable and make a correct answer look wrong.
50 Tiny Room Escape Level 1 quick answer: Turn on the light, take the key from beneath the armchair cushion, unlock the closet safe for the book, fit the lens to the tripod, copy the star pattern onto the candles, collect the bottle, and enter 1978 at the door.
Step-by-step walkthrough
Survey the room
Rotate the diorama until the bed wall is visible and switch on the light. Inspect the orange armchair, lift its cushion, and collect the small key hidden underneath. Stay in the close-up until the item or visual confirmation appears, then use Back to return to the rotating room.
How to know the solution worked
The most reliable confirmation is a visible state change: a compartment opens, a new item enters the inventory, the fire stops, or the final door releases. If 1978 is rejected, reopen both clue objects and make sure all four digits have been revealed before re-entering the code from the start. Do not repeat the last input indefinitely. Return one step in the chain and confirm that the required clue object was collected or inspected.
Important notes
- The verified video enters 1, 9, 7, 8 in that order.
- The room can be rotated freely; a missing object is usually on another wall rather than inside a separate scene.
- The candle pattern is read from the telescope, not guessed from candle height.
- Two optional collectible cards are present, but neither is required to open the door.
Because the diorama rotates, two screenshots of the same level can show completely different walls. The level title and required objects are stronger identifiers than camera angle alone. This is why the 50 Tiny Room Escape Level 1 page uses one primary room image, an exact title, and a video segment with explicit start and end points.
Search and inventory tips
- 1Turn on the light before searching the wardrobe.
- 2Inspect inventory objects from more than one side.
- 3Use the room overview to relocate the door quickly.
- 4Enter the code only after both clue objects are collected.
When the inventory appears full, inspect items before searching for another pickup. A tool may need a battery, key half, handle, or second clue before it becomes usable. After using an item, return to the room overview and rotate once; this makes the next altered wall easier to spot.
Cards and optional secrets
Two hidden cards can be collected in Perception. They add to the card collection but do not alter the 1978 door solution. Optional cards can be collected during the same run, but the exit sequence does not wait for them. If your only goal is to finish 50 Tiny Room Escape Level 1, prioritize the objects named in the quick answer.
Why the puzzle chain makes sense
The design of 50 Tiny Room Escape Level 1 teaches observation by splitting one answer across several physical relationships. A label supplies digits, a tool changes access, a visual pattern defines order, or a repaired device delivers instructions. The final keypad or door is therefore a summary of evidence already present in the room rather than a random guess.
In short, the complete 50 Tiny Room Escape Level 1 solution is: Turn on the light, take the key from beneath the armchair cushion, unlock the closet safe for the book, fit the lens to the tripod, copy the star pattern onto the candles, collect the bottle, and enter 1978 at the door. Follow the steps in sequence, watch for each state change, and use the room image to recover your orientation whenever a close-up leaves you on the wrong wall.
50 Tiny Room Escape Level 1: Turn on the light, take the key from beneath the armchair cushion, unlock the closet safe for the book, fit the lens to the tripod, copy the star pattern onto the candles, collect the bottle, and enter 1978 at the door.
What this video segment shows
The embedded 50 Tiny Room Escape Level 1 walkthrough starts at 0 seconds and stops before Level 2 begins. It shows the actual “Perception” room, the relevant close-up interactions, and the final exit. The player may rotate the diorama differently from you, so follow the objects and state changes rather than trying to duplicate every camera movement.
The key sequence is to combine the book's 19 with the bottle's 78 and enter 1978. Watch for the four correct keypad digits being accepted. That moment confirms that the solution has progressed; everything before it is evidence gathering, tool preparation, or access to the next mechanism. Keep the written steps open beside the clip so each short visual action remains connected to the clue that explains it.
Video checkpoints
- ROOMConfirm the title and layout
Match “Perception,” the wall colors, and the largest furniture before copying any code.
- ITEMSTrack required objects
Notice where each tool appears and whether the player inspects, combines, or immediately uses it.
- CLUEPause on digits or patterns
Codes should come from visible room evidence. Pause the clip when the source clue is shown, not only when the keypad is filled.
- EXITVerify the final state change
The door or final mechanism visibly releases before the player leaves the room.
What to watch closely
Inventory selection is easy to miss in a vertical mobile recording. Look near the bottom of the screen immediately before a tool is applied. If 1978 is rejected, reopen both clue objects and make sure all four digits have been revealed before re-entering the code from the start. If your room does not react, rewind to the preceding item pickup and confirm that your inventory contains the same object.
Before replaying the clip
- The verified video enters 1, 9, 7, 8 in that order.
- The room can be rotated freely; a missing object is usually on another wall rather than inside a separate scene.
- The candle pattern is read from the telescope, not guessed from candle height.
- Two optional collectible cards are present, but neither is required to open the door.
The footage is used as evidence for the order and result, not as a substitute for the written explanation. The text guide names each required dependency so you can continue without repeatedly scrubbing a long 50-level video.
Practice tips from the footage
- 1Turn on the light before searching the wardrobe.
- 2Inspect inventory objects from more than one side.
- 3Use the room overview to relocate the door quickly.
- 4Enter the code only after both clue objects are collected.
Text recap
The full 50 Tiny Room Escape Level 1 answer is: Turn on the light, take the key from beneath the armchair cushion, unlock the closet safe for the book, fit the lens to the tripod, copy the star pattern onto the candles, collect the bottle, and enter 1978 at the door. The video segment is credited to AliGames and was published 2023-11-25. Level Clue embeds it through YouTube's privacy-enhanced domain and does not load the player until you press the button above.
Quick feedback
Did this clue help you?
Your anonymous Yes or No helps us find walkthroughs that need another check.