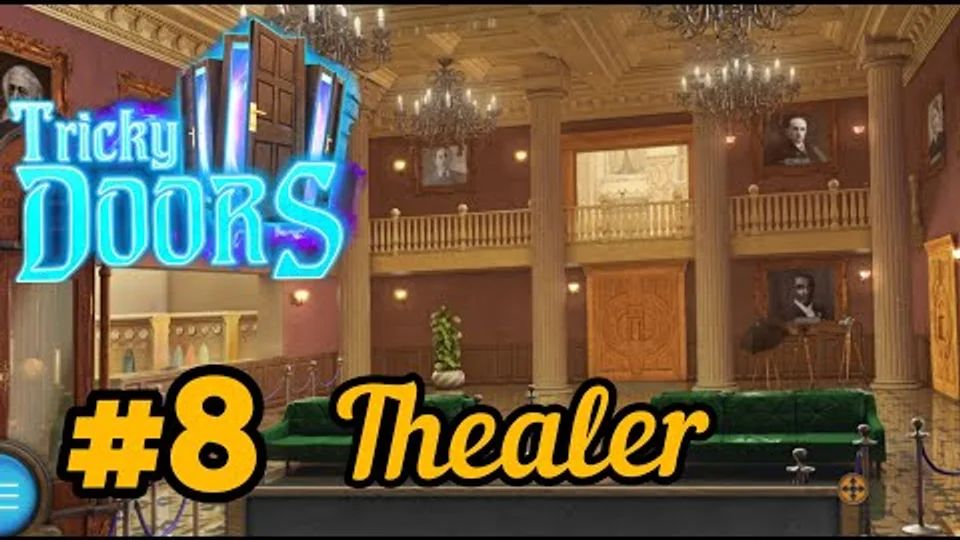
Use both “Theater” and the gameplay image. The page follows the 25-episode ordering checked on 2026-09-29.
Last verified: · Verification method · Report a correction
Tricky Doors Level 8 Theater solution
Tricky Doors Level 8 objective: Escape from the theater by collecting items, solving mask puzzles, creating tools like rope with hook and ladders, operating stage machinery with sandbags, finding codes from scenery, and arranging metal masks correctly. This level introduces theater-themed puzzles, mask arrangement mechanics, stage machinery operation, and scenery code puzzles.
Step-by-step walkthrough
Start the episode
Start in the theater foyer; open the counter behind the ropes on the left. Collect the porcelain mask (1 of 2) from the counter. open the teal jacket in the front to make it bigger; collect the handle from the pocket. Look at the green couch on the left; collect the tag from on top of the sofa. Collect the plank from under the sofa. Use the handle you just collected on the window on the right. open the handle twice to open the window, revealing a key on the ledge. Collect the key from the window ledge. Use the key on the grandfather clock on the left. Collect the second and last porcelain mask from inside the clock. Add both porcelain masks to the doors in the foyer; this unlocks a mini-game. The aim is to move the green chip to the green cells located at the top of the puzzle. Move the green chip and other pieces around to create a path for the green chip to reach the top. Move the green chip to the right where possible to navigate through the puzzle. Once the green chip reaches the green cells at the top, the doors open.
Continue the item chain — phase 2
Enter the hall (second scene); collect the tag from on top of the piano. Collect the piano key from on top of the harp on the right side. Look at the stage on the left side by the ladder; collect the knife. Collect the sandbag (1 of 4) located near the ladder on the stage. Go to the room in the back and find the toolbox in the back, right of the stairs. Collect the saw, hammer, and pincers from the toolbox. open the door on the left which has planks nailed on it. Use the pincers to remove the nails from the door. Collect the long plank and nails that fall from the door. Return to the previous room and open the harp to get a closer look. Use the pincers on the harp strings to collect the string. Return to the first scene (foyer) and open the coats on the left side. Notice the hanger next to the teal jacket is crooked; use the knife on it to get a hook. Use the knife on the rope in front of the sofa on the left. Combine the rope with the hook in your inventory to create a rope with hook. Return to the second room (hall) and use the rope with hook on the balcony.
Continue the item chain — phase 3
This allows you to climb up to the balcony. Use the pincers on the purse on the balcony to break it open. Collect the piano key and powder from the opened purse. Collect the broken binoculars from the chair on the balcony. Collect the plank leaning up against the wall on the right. Read the paper on the chair; it says 'The password for the safe is on the scenery'. Exit the balcony and return to the hall. open the ladder on the stage on the left. Place the long plank on top of the ladder. Use the saw on the long plank to cut it into two pieces. You now have four planks in total; use them on the ladder. Add the nails to the steps and use the hammer to secure them. Collect the completed ladder and add it to your inventory. Place the ladder under the light on the stage. open the light to get a closer look. There is a key behind the glass; use the hammer to break the glass.
Continue the item chain — phase 4
Collect the key from behind the broken glass. Go into the hallway and use the key on the door at the end with the masks on it. This unlocks a mini-game; the aim is to clear the path so the first can hit the button. Clear a path for all four buttons on the right to be pushed. Once all four buttons are pressed, the door to the dressing room opens. Enter the dressing room; collect the tweezers and brush from on top of the dressing table. Collect the tag from the chair. open the purple/pink dress on the left to lift it up. Collect the sandbag (2 of 4) revealed at the bottom of the dress. Return to the foyer and open the window on the right to enlarge it. Use the tweezers to remove a tag from the bottom of the window. You should now have all four tags; return to where the coats are on the left. Place all four tags on the counter. Use the powder and brush from your inventory on the tags. This reveals four numbers: 36, 35, 34, and 38. Look at the hanging jackets at the corresponding numbers and note their colors.
Continue the item chain — phase 5
For number 36, note the jacket color (example: Red). For number 35, note the jacket color (example: Green). For number 34, note the jacket color (example: Purple). For number 38, note the jacket color (example: Blue). Return to the dressing room and open the drawer. Input the color combination in ascending order of the numbers (34, 35, 36, 38). For example, if the colors are: 34-Purple, 35-Green, 36-Red, 38-Blue, enter: Purple, Green, Red, Blue. open the bar at the top; it will turn green when the combination is correct. Click off of the lock to open the drawer. Collect the weight and the last piano key from the drawer. Return to the hall and use all the piano keys on the piano. This unlocks a mini-game; the aim is to highlight in green the required combination of squares on the lid by pressing the keys. The squares required may vary for each player, so observe the pattern carefully. Once completed, the piano reveals a key. Return to the dressing room and use the key on the blue wardrobe. Open the wardrobe door and open the jacket inside.
Continue the item chain — phase 6
open the jacket to open it and collect the lenses from inside (1 of 2). Exit the close-up inspect of the jacket. Collect the sandbag (3 of 4) from the bottom left of the wardrobe. Return to the first room (foyer) and look for the camera in front of one of the portraits. open the camera to enlarge it. Use the knife on the camera lens to collect it (2 of 2). Add both lenses to the broken binoculars in your inventory to repair them. In your inventory, combine the string with the weight. Use the pincers to attach them together, creating a clock weight. open the grandfather clock on the left side of the foyer. Add the clock weight to the clock; this unlocks a clock mini-game. The aim is to open the acquired windows based on the lights in the dressing room. Remember which lights were on and which were off around the mirror in the dressing room. Open the doors where the lights were on in the dressing room. Once completed, you'll be given a hint for the chest puzzle. Return to the dressing room and open the chest.
Continue the item chain — phase 7
Use the hint from the clock puzzle to solve the chest mini-game. The aim is to place the chips according to the hint by swapping them using the arrow buttons. Once completed, the chest opens; collect the metal mask (1 of 2) and wheel. Return to the foyer and find the briefcase by the coats. Use the wheel on the briefcase. Look at the portraits above the cloakroom; find the one that doesn't have a completed date. The code on that portrait is 930; enter this code on the briefcase. The briefcase opens; collect the lever from inside. Go to the hallway leading up to the dressing room. Find the spot on the right where you can add the sandbags from your inventory to the strings. Add all four sandbags to the strings. Use the lever on the side to move the sandbags up and down. Return to the theater hall and look at the stage. The background scenery can now be seen; use the binoculars to look closely at it. There are four-digit codes hidden in each scene. Change the lever position to move the sandbags and change the scenery.
Complete the escape
When the first sandbag is up, look at the rock on the left side of the scenery. The code carved on the rock is 4537; this is the code for the safe. Return to the dressing room and open the safe on the left side of the table. Enter the code 4537 on the safe. Make sure to open the green button after inputting the code to open the safe. Collect the last metal mask (2 of 2) from the opened safe. Return to the foyer and add both metal masks to the doors on the right side. This unlocks a final mini-game; arrange the masks so that emotions and colors are not repeated in each row and column. The emotions/expressions are: sad, happy, shocked, and angry. The materials are: wood, silver, stone, and gold. Each row and column must have unique emotions and unique materials. Row 1 solution: happy (wood), shocked (silver), sad (stone), angry (gold). Row 2 solution: shocked (gold), happy (stone), angry (silver), sad (wood). Row 3 solution: sad (silver), angry (wood), happy (gold), shocked (stone). Row 4 solution: angry (stone), sad (gold), shocked (wood), happy (silver). Once all masks are correctly arranged, the doors open; complete Level 8; Theater.
Compiled and edited by Level Clue from the sources linked above. Gameplay images and videos belong to their credited creators. How we check guides.
Theater: Escape from the theater by collecting items, solving mask puzzles, creating tools like rope with hook and ladders, operating stage machinery with sandbags, finding codes from scenery, and arranging metal masks correctly. This level introduces theater-themed puzzles, mask arrangement mechanics, stage machinery operation, and scenery code puzzles.
Quick feedback
Did this clue help you?
Your anonymous Yes or No helps us find walkthroughs that need another check.