Use both “Antique District” and the gameplay image. The page follows the 25-episode ordering checked on 2026-10-18.
Last verified: · Verification method · Report a correction
Tricky Doors Level 9 Antique District solution
Tricky Doors Level 9 objective: Escape from the antique district by collecting items, solving pipe and lock puzzles, creating magic flowers, operating gramophones to calm snakes, arranging famous landmarks on a map, and painting a landscape according to hints. This level introduces antique shop puzzles, pipe manipulation mechanics, color mixing, landmark geography, and painting mechanics.
What you see at the start
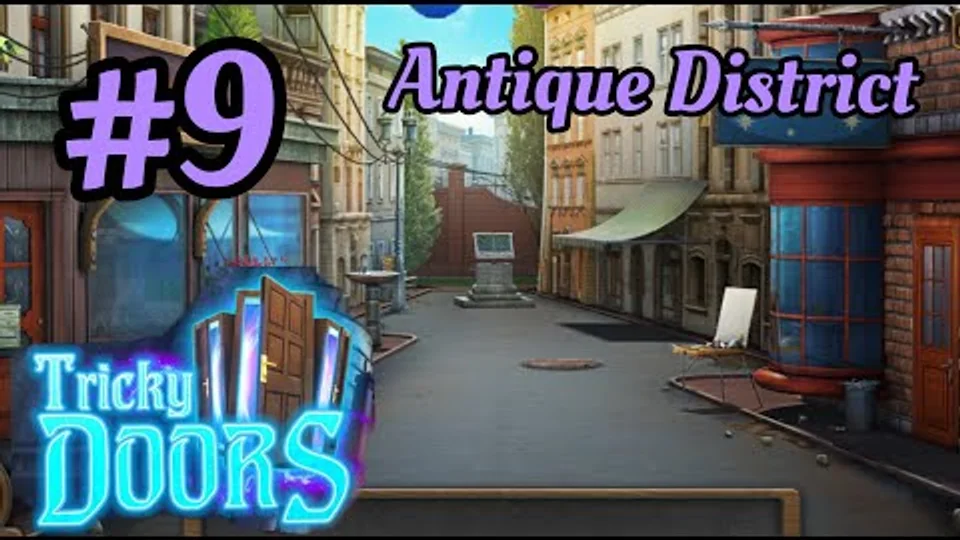
A quiet street in the antique district: a shop with a hanging flower box and a red door with a postbox on the left, an artist's easel outside the shop on the right, a manhole cover and a stone fountain in the middle of the road.
Step-by-step walkthrough
Start the episode
Start in the street of the antique district; look at the easel in front of the shop on the right. Collect the palette from the easel first. The screwdriver will be under the palette; collect it. Look at the flowerpot hanging on the shop on the left side; collect the handle from the flowers. Use the screwdriver on the bars on the flower pot to remove them and collect the metal bar. Use the metal bar on the drain under the flower pot; this first bends the bar to create a hook. Use the bent bar (hook) on the drain again to retrieve the keys. Insert the key into the postbox on the door on the left side. open the postbox again to unlock a mini-game. The aim is to pull the centerpiece down to open the lock by moving pipes around. Clear the left side of the lock by moving pipes to the right side. Move the red block all the way to the left and as far down as it will go. Move all the smaller pipes at the top of the red block and across to the left side. This helps move the bigger pipes on the right side, clearing a path for the red block to reach the end goal.
Continue the item chain — phase 2
Once the red block reaches the end, the puzzle is solved. Collect the mysterious letter from the opened postbox. Attach the handle that appears to the right side immediately (it cannot be added to inventory). Collect the Eiffel Tower and newspaper from the postbox. The door is still locked, but the key is in the hole; slide the newspaper under the door. Go back to the top of the door and use the screwdriver to push the key through. Return to the bottom of the door and open the newspaper to bring it forward. Collect the key from the newspaper. Place the key into the lock; this starts a mini-game. Rotate the key to line up the pins and open the lock. The puzzle solution is the same for everyone: click the right arrow twice and the up arrow once. Once unlocked, enter the antique store. In the antique store, look at the red table on the left; move two objects to reveal the Great Sphinx behind them. Collect the Great Sphinx from behind the objects.
Continue the item chain — phase 3
On the right side of the room near the cash register, collect the kettle. Look at the samovar (contraption) next to where the kettle was found. Use the screwdriver on the valve of the samovar to remove it and add it to your inventory. Tip over the middle cup on the fireplace to collect matches. Look at the desk at the back of the room; close the music player to reveal the lamp behind it. Collect the lamp from behind the music player. Look up at the doll hanging from the ceiling in the middle of the room; collect the loudspeaker from on top of it. Collect the poker leaning on the fireplace on the right side. Put the palette with the picture in the room (place it on the easel or designated spot). Use the matches on the lamp in your inventory to light it. Return to the street and use the poker to lift the cover of the hatch in the middle of the road. Place the lit lamp inside the hatch to illuminate it. Collect the Statue of Liberty from the left side of the illuminated hatch. Click to go down the hole; a mini-game appears. Add the valve to the middle of the mechanism to start the mini-game.
Continue the item chain — phase 4
The aim is to set the time on the sensors so that the steam system brings the ball to the red platform below. The puzzle solution is the same for everyone; set the timers according to the solution pattern. open the valve after setting the timers correctly; watch the ball reach the end. The water fountain now works; use the kettle on the fountain to fill it with water. Return to the antique shop and use the poker to move the embers in the fireplace. Pour the water from the kettle over the fire to extinguish it. Collect Big Ben and a key from the extinguished fireplace. Return to the street and open the door for the shop on the right. Use the key on the door; this unlocks a chip arrangement puzzle. Arrange the chips according to the hint to unlock the door. The pieces may be in different positions for different players, but try placing them in order: blue, green, red, then yellow. Once completed, enter the second shop (magic shop). In the magic shop, collect the broom from the cabinet on the right. Collect a piece of paper from the table at the back.
Continue the item chain — phase 5
Return to the street and use the broom on the sign of the other shop. There is a key hanging from the side of the sign; collect it. Return to the antique shop and use the key on the chest. This unlocks a mini-game; move the elements to connect all the rays. The starting positions of the elements may vary for each player, but the goal is to connect all rays. Once all rays are connected, the chest opens. Collect the disc record and remi crystal (1 of 4) from the opened chest. Look at the glass cabinet on the left side of the fireplace. Use the poker on the glass cabinet door to open it. Add the record, loudspeaker, and handle to the cabinet. This creates a gramophone; collect it and add it to your inventory. Return to the magic shop and use the gramophone on the snakes. Turn the handle on the gramophone for it to play a tune. The music puts the snakes to sleep.
Continue the item chain — phase 6
Look in the container with the sleeping snakes; collect a gem, flower sprout, and read the note. The note shows that you need to add something to the flower to make it blossom. Return to the antique shop and put the gem on the suit of armor arm. This opens the armor's hand, revealing a key. Return to the magic shop and use the key on the box on the wall on the right. This unlocks a mini-game; move the crystals so they occupy the holes when the boards are aligned. The puzzle layout may vary for each player, but arrange the gems to complete the puzzle. Once the cabinet opens, collect a remi crystal (2 of 4) from the top shelf. Keep clicking on the top shelf to move items out of the way. Collect the teal potion from the top shelf. Go to the back of the magic shop and open the table. Add the flower sprout to the number 5 pot. Add the potion to the flower sprout to create a magic flower. open the purple curtain at the back of the room. Add the magic flower to the curtain to start a mini-game.
Continue the item chain — phase 7
The aim is to arrange the pots in the correct positions according to the numbers on the cabinet. The puzzle has different numbers for everyone, so observe the numbers on the cabinet carefully. Once completed, collect another remi crystal (3 of 4). Look at the table at the back of the magic shop; there is a cage with a three-digit lock. The lock shows the colors yellow, red, and blue. Count the number of mice in different colors around the antique district (there are 11 mice total). The combination is based on the number of mice of each color; for example, if there are 6 yellow, 2 red, and 3 blue mice, the code is 623. Enter the three-digit code based on the mouse counts. Once the lock is solved, you'll receive different colored mice. Return to the antique shop and use the colored mice on the cat. This makes the cat move; collect the crystal ball from where the cat was. Return to the magic shop and add the crystal ball to the red table in the right corner. This unlocks a mini-game; choose cards to compose a symbol inside the ball. There are two cards that will make the symbol in the ball; select them to complete the puzzle.
Complete the escape
This unlocks the box on the side; collect the Opera Sydney House from inside. Put the paper on the orb; this creates a landscape that is added to your inventory. Return to the street and open the stone at the back. Add all five famous landmarks to the bottom: Great Sphinx, Eiffel Tower, Statue of Liberty, Big Ben, and Opera Sydney House. This unlocks a landmark placement game. Use the buttons to rotate the landmarks so they are in the correct country on the map. Place each landmark in its correct location: Great Sphinx (Egypt), Eiffel Tower (France), Statue of Liberty (USA), Big Ben (UK), Opera Sydney House (Australia). Once all landmarks are correctly placed, a drawer unlocks underneath. Collect the last remi crystal (4 of 4) and a brush from the drawer. Return to the antique shop and add all four remi crystals, brush, and landscape to the painting. You need to paint the image according to the landscape hint. Mix colors carefully to match the landscape: Purple (red + blue), Light blue (blue + white), Pink (red + white), Green (yellow + blue). You will also need to use blue, red, and yellow directly in the painting. Paint the image to match the landscape, using the correct colors in the right places. Once the painting is completed, you'll have completed Level 9; Antique District.
Video checkpoints
- 0:08 The easel's tray holds a paint palette and jars; the screwdriver lies underneath.
- 0:24 The bent metal bar is labelled “Hook” when it is used on the drain grate.
- 0:40 The postbox opens a sliding-pipe puzzle: a red block must reach the red marker at the bottom while L-shaped and straight pipes are shuffled out of its way. It takes this player about 1 minute 20 seconds.
- 2:00 The opened postbox holds a letter and the Eiffel Tower figure.
- 2:32 The door lock is a row of pins moved with left, right, up and down arrows.
- 2:56 Inside the dim antique shop, matches come from a cup by the fireplace and a poker leans beside it.
- 3:36 A green oil lantern is lit with the matches and lowered into the open manhole, lighting the shaft.
- 3:52 Below the street, a steam-pipe board has white and red clock dials on its pipes; the timers are set so a ball rolls through to the red platform (about 1 minute 30 seconds in the recording).
- 5:44 With the fountain working, the kettle fills (“Kettle with water”) and puts out the fireplace; Big Ben is inside.
- 6:08 The shop door on the right opens a grid of red, green, blue and yellow flasks to arrange by the colour key above it; the panel glows when it is solved.
- 7:12 The second room is a magic shop with a snake in a glass tank, a gramophone, a purple curtain and shelves of bottles.
- 7:36 A hexagonal board of gears and light bars is turned until every bar lights up.
- 8:40 A record is placed on the gramophone; playing it calms the snake in the tank.
- 9:04 A key comes from the hand of the suit of armour.
- 9:20 A diamond-tile panel is slid into place with an infinity-shaped knob.
- 9:44 A potion is found on the bottle shelves; the game notes that “the contents of the middle shelf are not very eye-catching”.
- 10:24 A cabinet of numbered flower pots shows row and column totals (20, 26, 14 and 17, 12, 13, 18) for arranging the pots.
- 12:48 A crystal ball shows a symbol, and the matching card is chosen from a row of six while a bar of lights fills.
- 13:52 The Sydney Opera House joins the other landmarks, and all of them are placed on the world map.
- 14:32 The final easel painting of a street is filled in with red, blue, yellow, white and green from the palette.
How the level ends
The finished painting glows like a portal on the wall of the antique shop, ending the episode.
Compiled and edited by Level Clue from the sources linked above. Gameplay images and videos belong to their credited creators. How we check guides.
Antique District: Escape from the antique district by collecting items, solving pipe and lock puzzles, creating magic flowers, operating gramophones to calm snakes, arranging famous landmarks on a map, and painting a landscape according to hints. This level introduces antique shop puzzles, pipe manipulation mechanics, color mixing, landmark geography, and painting mechanics.
Quick feedback
Did this clue help you?
Your anonymous Yes or No helps us find walkthroughs that need another check.