Use both “Amusement Park” and the gameplay image. The page follows the 25-episode ordering checked on 2026-09-29.
Last verified: · Verification method · Report a correction
Tricky Doors Level 5 Amusement Park solution
Tricky Doors Level 5 objective: Escape from the amusement park before sunrise by collecting items, solving puzzles, restoring power to the rides, completing shooting and racing mini-games, and unlocking the final door. This level introduces electrical puzzles, memory-based shooting games, racing challenges, and multi-room navigation in an abandoned amusement park setting.
Step-by-step walkthrough
Start the episode
Start in the amusement park entrance; open the kiosks at the back to explore them. Open the glass on the hotdog stand and collect the grill fork from inside. Tip over the bin on the floor near the kiosks; collect cartridges and glass cutter from the rubbish that spills out. open the shooting range stand and collect the valve from the left side on top of the counter. Use the valve from your inventory on the pipe attached to the building; click it to turn off the water. open the fuse box on the building on the right and open it; open the keys on the left to collect the keychain. Use the keychain on the toolbox on the floor; this unlocks it and you can collect a wrench and scissors (the keychain is removed from inventory). open the grass in the middle of the scene; collect a chip (1 of 4) from the ground. Use the scissors from your inventory on the pipe to cut it; this gives you a hose and garden shears. Combine the hose with the garden shears in your inventory to create scissors with handles. Use the scissors with handles on the wires in the fuse box to collect wires. Look at the box next to the kiosks in the background; open it to make it bigger. open the box to open the power supply of the wheel motor and add the wires to it. This opens a compartment revealing a wire connection mini-game; solve it by connecting the wires to restore power.
Continue the item chain — phase 2
The wire puzzle solution requires arranging wire pieces in the correct order to complete the circuit. Once solved, the carriages on the wheel start moving and one of them lights up glowing red. open the glowing red carriage; use the glass cutter on the glass to cut an oval opening. Collect the gun and knob from the seat inside the carriage. Add the cartridges from your inventory to the gun to load it. Go to the shooting range stand; this unlocks a shooting mini-game. Solve the shooting game by shooting animals in the correct order; this is a memory game where targets stay down when correct and pop back up when wrong. When a target stays down, you know it's correct; if another target pops back up, repeat the sequence up to that point and try a different target. After completing the shooting game, a key drops down; open it to add it to your inventory. Enter the building on the left; open the map hanging on the wall on the right by the door. This reveals a hole behind the map; collect the button from inside. open the crack on the floor in front of the sofa on the left; use the grill fork to lift the tile and collect a chip (2 of 4). Look at the alarm on top of the door; use the wrench on it to open it up. open the green wire inside the alarm to make it move and light up green. Use the key from your inventory on the door and open it again to enter the next room.
Continue the item chain — phase 3
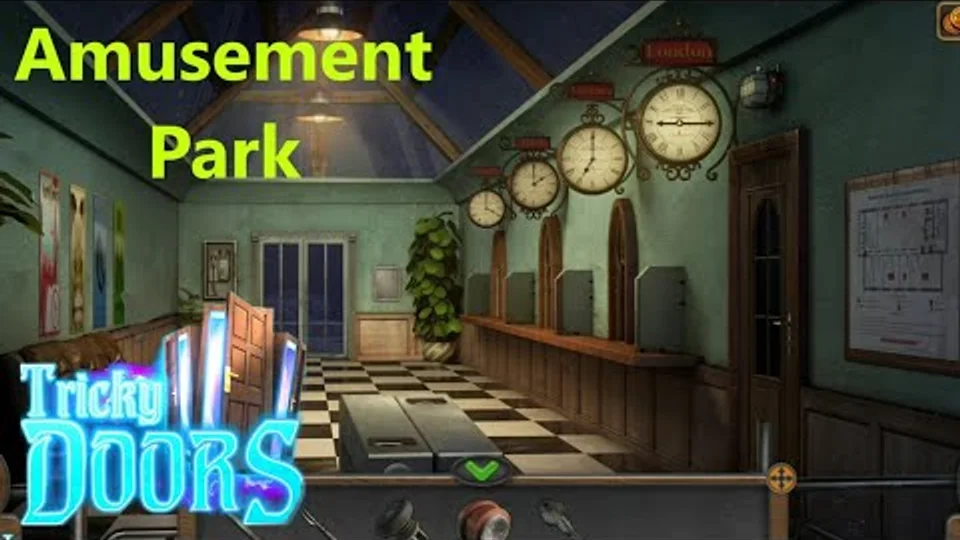
The room is dark; collect the gloves from the coat pocket hanging on the right. Return to the carriage and use the gloves to safely remove the light bulb. Go back to the dark room; open the sconce on the wall on the left of the coat. Twist the sconce towards you and use the light bulb in it to light up the room. In the now-lit office, collect the kettle from on top of the table. Collect the paperclip from on top of the table. Use the paperclip to open the drawer on the table; collect the tweezers from inside. open the radio at the back of the room next to the safe; use the knob you collected on it to unlock a mini-game. The radio puzzle requires rotating knobs to set the correct time position of the arrows. Look at the picture behind the calendar; it shows Big Ben, a landmark in London. Check the clock in the hallway; the first clock shows the time in London (this time may vary for different players). Set the radio dials to match the time shown on the London clock (for example, if it shows 11:25, set the dials to that time). open the radio again after setting the time; this reveals a knife under the radio, collect it. Return to the hallway; open the grill on the left side of the sofa.
Continue the item chain — phase 4
Use the tweezers to extract the chip (3 of 4) from the grill. open the phone box at the back of the hallway; use the knife on the number pad to break the lock. open the phone box again to reveal a printed circuit board; collect it. Return to the office and open the safe. Open the square tab compartment on the safe and add the green button from your inventory to it. This unlocks a button combination mini-game; you need to click buttons in the correct color order. Look at the four posters on the wall in the hallway on the left side; they show different colors. The color combination order is: red, yellow, blue, and green; click the safe buttons in this order. Once the combination is solved, the safe opens; collect the token from inside. Return to the first scene and open the kiosks. Use the token on the machine with the wheel on it on the left side and hit the red button. This unlocks a racing mini-game; use the arrows to navigate the correct lane and avoid walls to reach the finish line. After completing the racing game, collect the cryptex device that appears. Use the kettle on the water bottle behind the trash can to get a kettle full of water. Return to the office and use the printed circuit board on the mechanism on the table.
Complete the escape
Click again to close the device; this reveals a number entry mini-game. When the bin was tipped over earlier by the kiosks, there was a newspaper with numbers on top. Use the numbers from the newspaper (5286) to enter on the device to complete it. After entering the correct numbers, a red code appears on the device. This code is different for each game; use it to change the characters on the cryptex device. Once the cryptex is unlocked, it reveals a compartment with a key inside; collect it. Place the kettle with water on the kettle stand on the table. Wait for the water to boil; the window will steam up revealing a code. Use the key you just found on the cash register on the table; this reveals a keypad. Enter the code 374 on the keypad (this code is revealed on the steamed window). This opens the drawer to the cash register; collect the last chip (4 of 4) from inside. Return to the corridor and look for the panel on the wall to the right of the door. open the panel to open it; use all four chips here to unlock a mini-game. The aim of this final puzzle is to light up all the buttons to complete the game. Once you've completed this puzzle, the doors will open and you'll have completed Level 5; Amusement Park.
Compiled and edited by Level Clue from the sources linked above. Gameplay images and videos belong to their credited creators. How we check guides.
Amusement Park: Escape from the amusement park before sunrise by collecting items, solving puzzles, restoring power to the rides, completing shooting and racing mini-games, and unlocking the final door. This level introduces electrical puzzles, memory-based shooting games, racing challenges, and multi-room navigation in an abandoned amusement park setting.
Quick feedback
Did this clue help you?
Your anonymous Yes or No helps us find walkthroughs that need another check.